


How to prepare your bike for winter?
of reading

Have you already prepared your bike for winter storage?
If not, give your bike a little extra love and put it away for a winter nap! You'll thank yourself in the spring.
Take advantage of the holidays to do something good - get rid of the dirt from your bike and prepare it for winter after a busy summer in the saddle.

There are several important aspects you need to keep in mind when storing your bike for winter, so that it's ready to ride when the good weather arrives.
Follow our step-by-step guide to properly store your bike for winter, and you won't have to worry about a thing during the next cycling season.
1. Inflate bike tires!
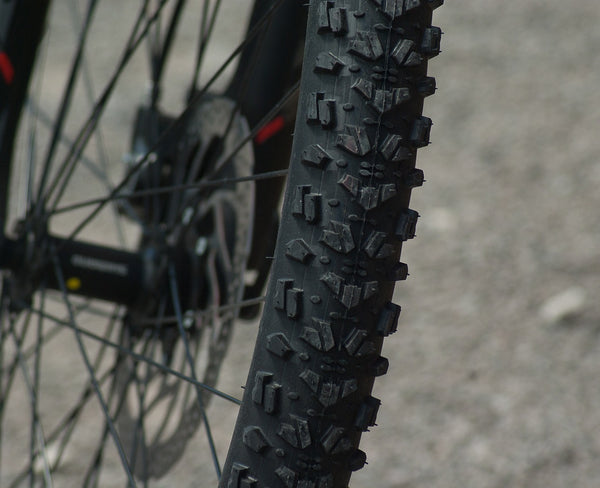
Are you planning to store your bike by resting it on its tires rather than hanging it from the ceiling? Then this part is particularly important.
If your tires are flat, the weight of the bike puts pressure on the rubber through the rims. This risks deteriorating your tires over time - the rubber can deform or develop a weak spot in the sidewall.

So be sure to inflate your tires and check them regularly, as they can lose pressure during the long winter months. Remember that if they deflate in cold weather, the tire sidewalls may crack when you reinflate them in spring.

Pro tip: the appropriate air pressure for your tires is printed on the sidewall of the tire. In most cases, it is indicated in PSI (pounds per square inch) or kPA (the metric unit of pressure measurement).
2. Clean your bike!

Remember when you bought your bike brand new? It was shiny and sweet like candy, and clean as a whistle... Of course, that was a long time ago and it's no longer true. Bikes get dirty. Obviously!
But it's still possible to see your bike almost in the same light as when you first met it. Just give it a thorough cleaning. Before storing your bike for winter, wipe everything down, including the frame, tires, grips, saddle, and don't forget to clean the chain.
Here's what you'll need:
- A bucket of warm water
- Bike cleaner (or medium dish soap) and lubricant
- A degreaser
- A sponge and rags
- A brush

How to:
- Apply cleaner or dish soap to the frame and get to work with a sponge and warm water to remove dirt.
- Dip a chain brush in degreaser and scrub the cassette, jockey wheels, chainrings, and chain. Then rinse everything with water.
- You can now flip your bike wheels if you wish - the messiest part is over.
- Next step: brush the braking area of the rims thoroughly. Make sure no bike cleaner is left on the rims.
- Rinse your bike with clean water and wipe it with a sponge or cloth.
Immediately dry your bike with a dry cloth.

Pro tip : do not use a high-pressure cleaner, as it can spray water where it shouldn't go and damage your bike's components.
3. Inspect your bike!

Now that your bike is clean, this is the ideal opportunity to inspect it for any damage. The more you've ridden, the more likely there are technical issues with certain parts of the bike.
So start by checking the overall condition of your bike. Then, take a closer look at the frame. Look for any signs of cracks or metal fatigue, especially around the welds and on the bottom bracket. This part of your bike carries significant weight and, depending on the type of activity you do, it can be subjected to high stress.

Next, move on to inspecting the wheels, tires, and brake pads. Be alert for loose or broken spokes on the wheels. Spin them to see if the wheels run straight, without any sudden deviation from side to side. As for the brake pads, check that they are properly aligned and not excessively worn.

Pro tip: if you want to check your bike for more serious damage, have it serviced by a professional before winter. This will help you avoid long queues, as bike shops will certainly be very busy in spring.
4. Lubricate your bike's cables and chains!

Lubrication is not an option, it's a must. Bike lubrication prevents corrosion, protects moving parts from excessive wear, and is crucial for the proper long-term functioning of the bike.
Spend a few minutes lubricating the cables that control your brakes and gear shifting. This will prevent them from seizing up when you take the bike out in spring. Then, also lubricate the chain to prevent rust.
To ensure your bike parts are properly lubricated, put a few drops of lubricant on a rag and rub the bike parts. When choosing a lubricant, keep in mind that a light bike lubricant is best. Oil that is too thick attracts a lot of dirt. Conversely, oil that is too thin dissipates quickly and doesn't last.
 Pro tip: do not over-lubricate, as this can lead to poor performance and damage to bike components.
5. Bike cover

Now it's time to say goodbye and cover your old friend. You may think your apartment is absolutely safe or that nothing can damage your bike in the garage. However, it is beneficial to cover the bike to avoid small dust particles that could compromise moving parts.
1001 Housse bike covers are an excellent choice for storing the bike in your living space because they add a touch of bright color and design for indoor addicts.
We also offer outdoor bike covers (waterproof, anti-UV, snow protection, etc.) Practical and designed to store and protect your bike.

Pro tip: Also use this DIY bike maintenance checklist to better care for your bike and make it last longer.
1 comment




Thierry
Merci des conseils !